How can we help?
Create and manage custom fields for actions
1/ Defining a customised field of action
A custom field is a zone in which you can attach data to an action.
You can have as many custom fields as you like for an action.
The advantage is that you can sort action plans according to the values in these custom fields.
For example, as part of a quality, safety or certification action plan, we can link actions to types of anomaly or process.
In addition to the filters and sorting options, it will also be possible to create visual graphs by custom field value (see graphical dashboard).
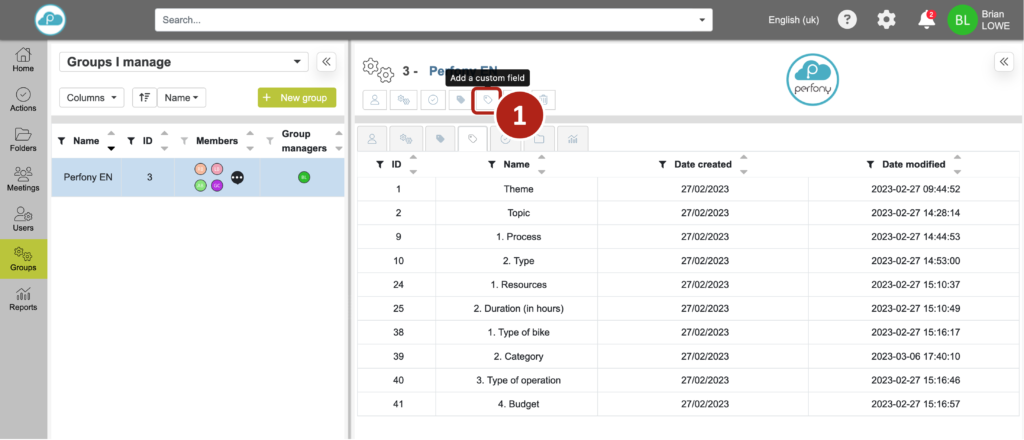
These fields can be customised via the “Groups” menu by clicking on “Add a custom field” .

2/ Customise action fields
When you click on “Add a custom field”, a popup window appears invites you to :
Give a name to your field and select the type of field. There are 3 possibilities:
-
- A free field for text
- A fixed list for a drop-down menu
- A field for numerical values
In the following example, we select “fixed list”. When clicked, a field appears below in which you can enter the desired values.
These values will appear in the list of possible choices for your file. The order of the values in the list is as shown here.
There are four boxes to tick if you wish:
-
- Hide the values of the search function field (if your fields are numerical values, there’s really no point in displaying them)
- Make entry of the field mandatory when creating or closing the action (useful for having a complete action database)
- Pre-fill sub-actions with values already entered in the main action (to save time)
Once you have completed your list and choices, click “Add” and your custom field will appear in the list of action fields.

3/ Modifying a customised action field
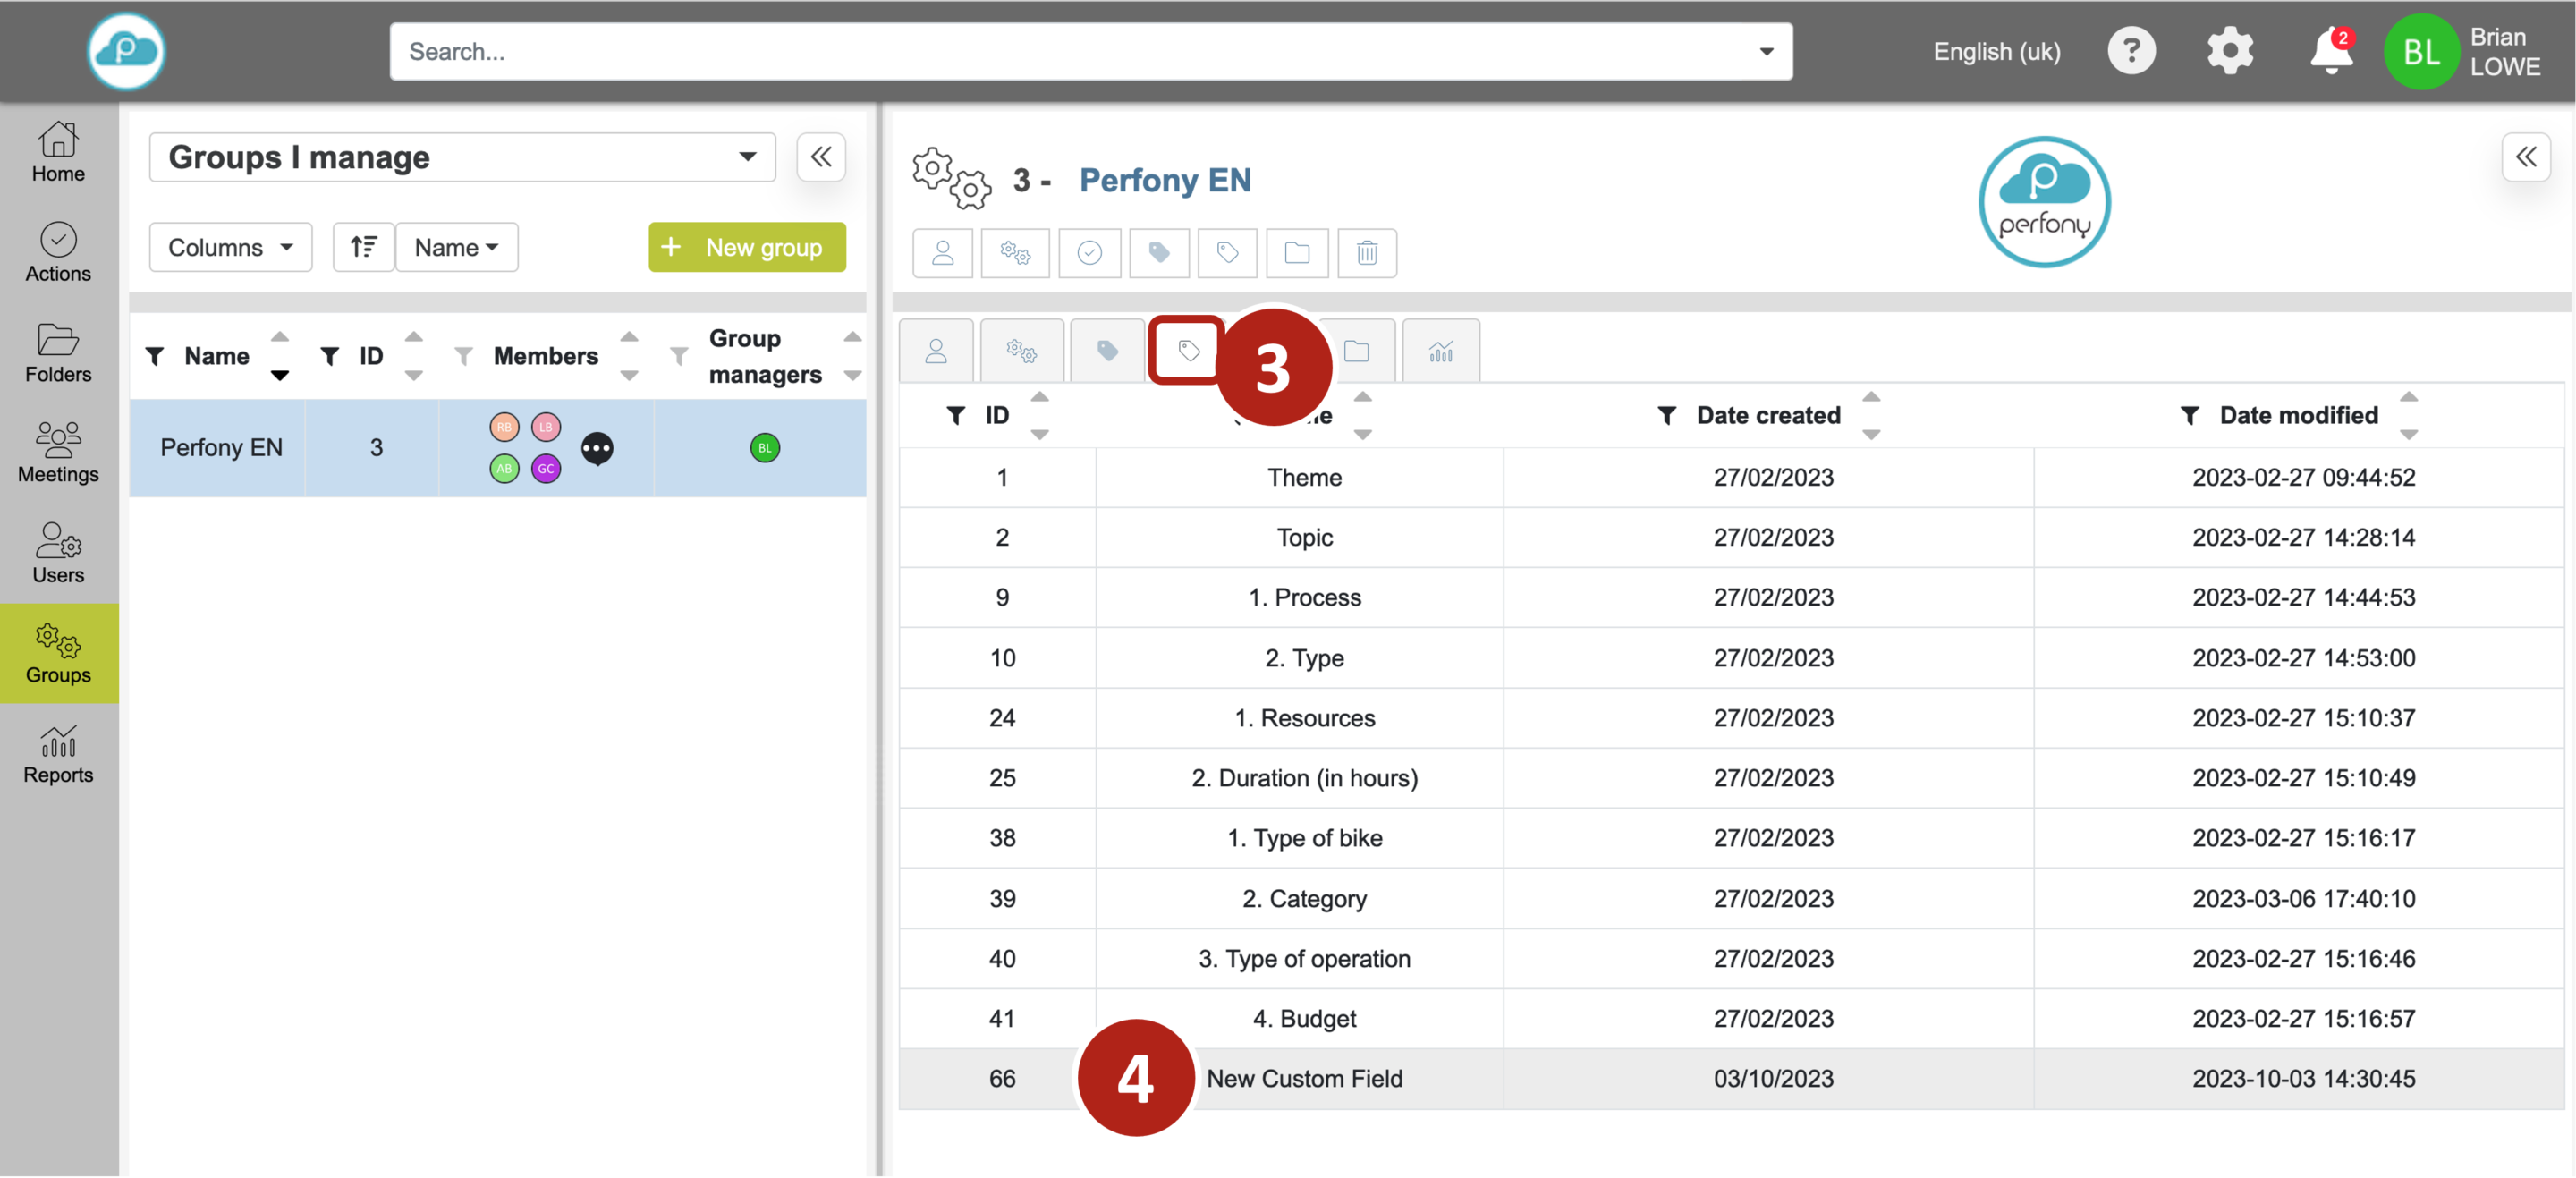
You can change a custom field at any time. To do this, click on the “Custom fields for actions” tab and select the required field .
The configuration popup appears and you’ll be able to :
-
- change field name
- add/modify/remove values from the list
- tick or untick the boxes to hide the search, obligation and pre-fill sub-actions
- delete the field
Please note: any deletion or modification of a value in a list will result in the disappearance of the value in the current actions (status from 0% to 100%). Closed actions, on the other hand, will retain their previous values.
You cannot change the nature of the field. If your field has been created on a “fixed list” model, you cannot transform it into a free-form or numeric format. You then need to create a new field.

4/ Use a custom field for your actions
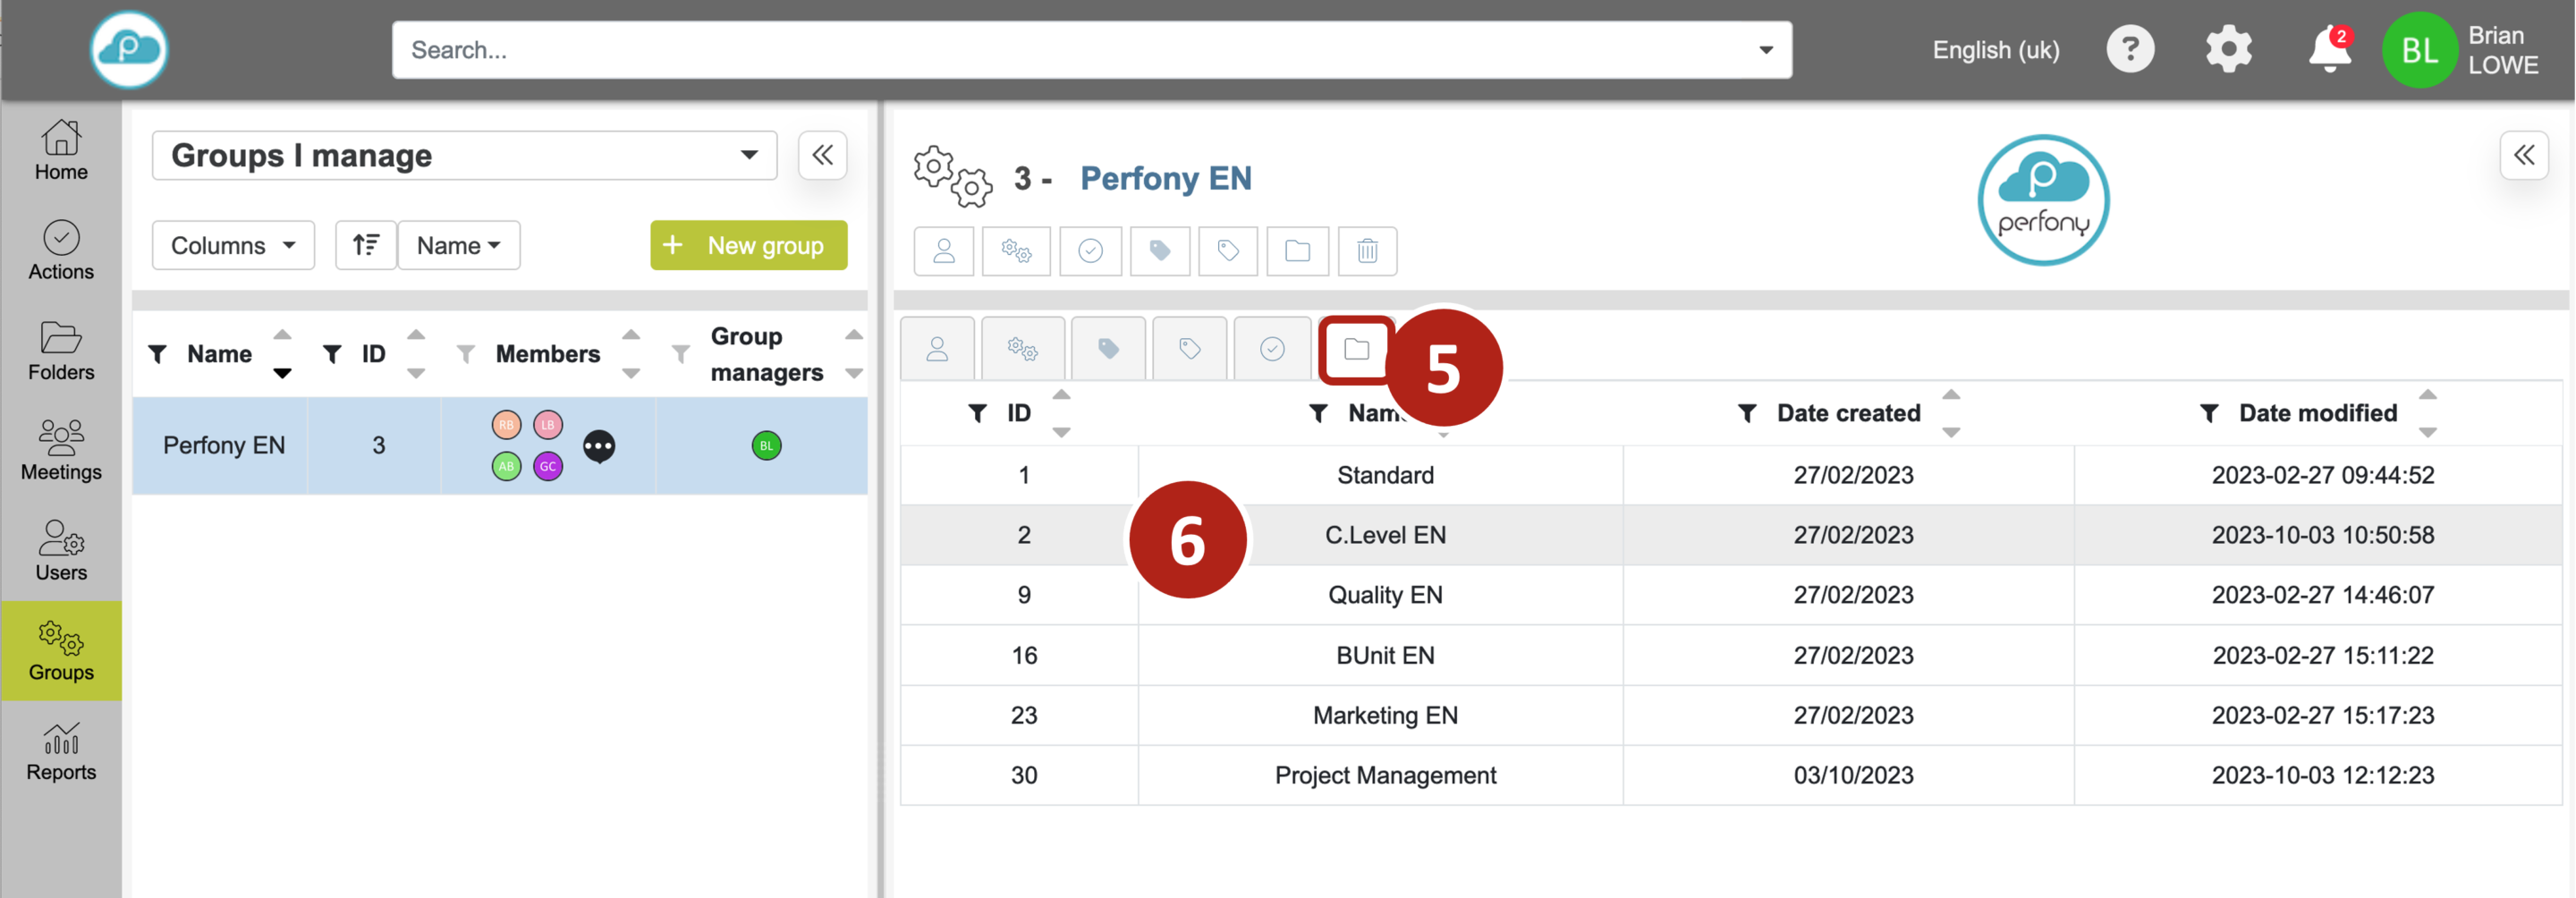
Here’s how to attach a custom actions field to a folder template. Click on the “folder template” tab , select model (to create a folder template, see the “Create and manage folder templates” page).
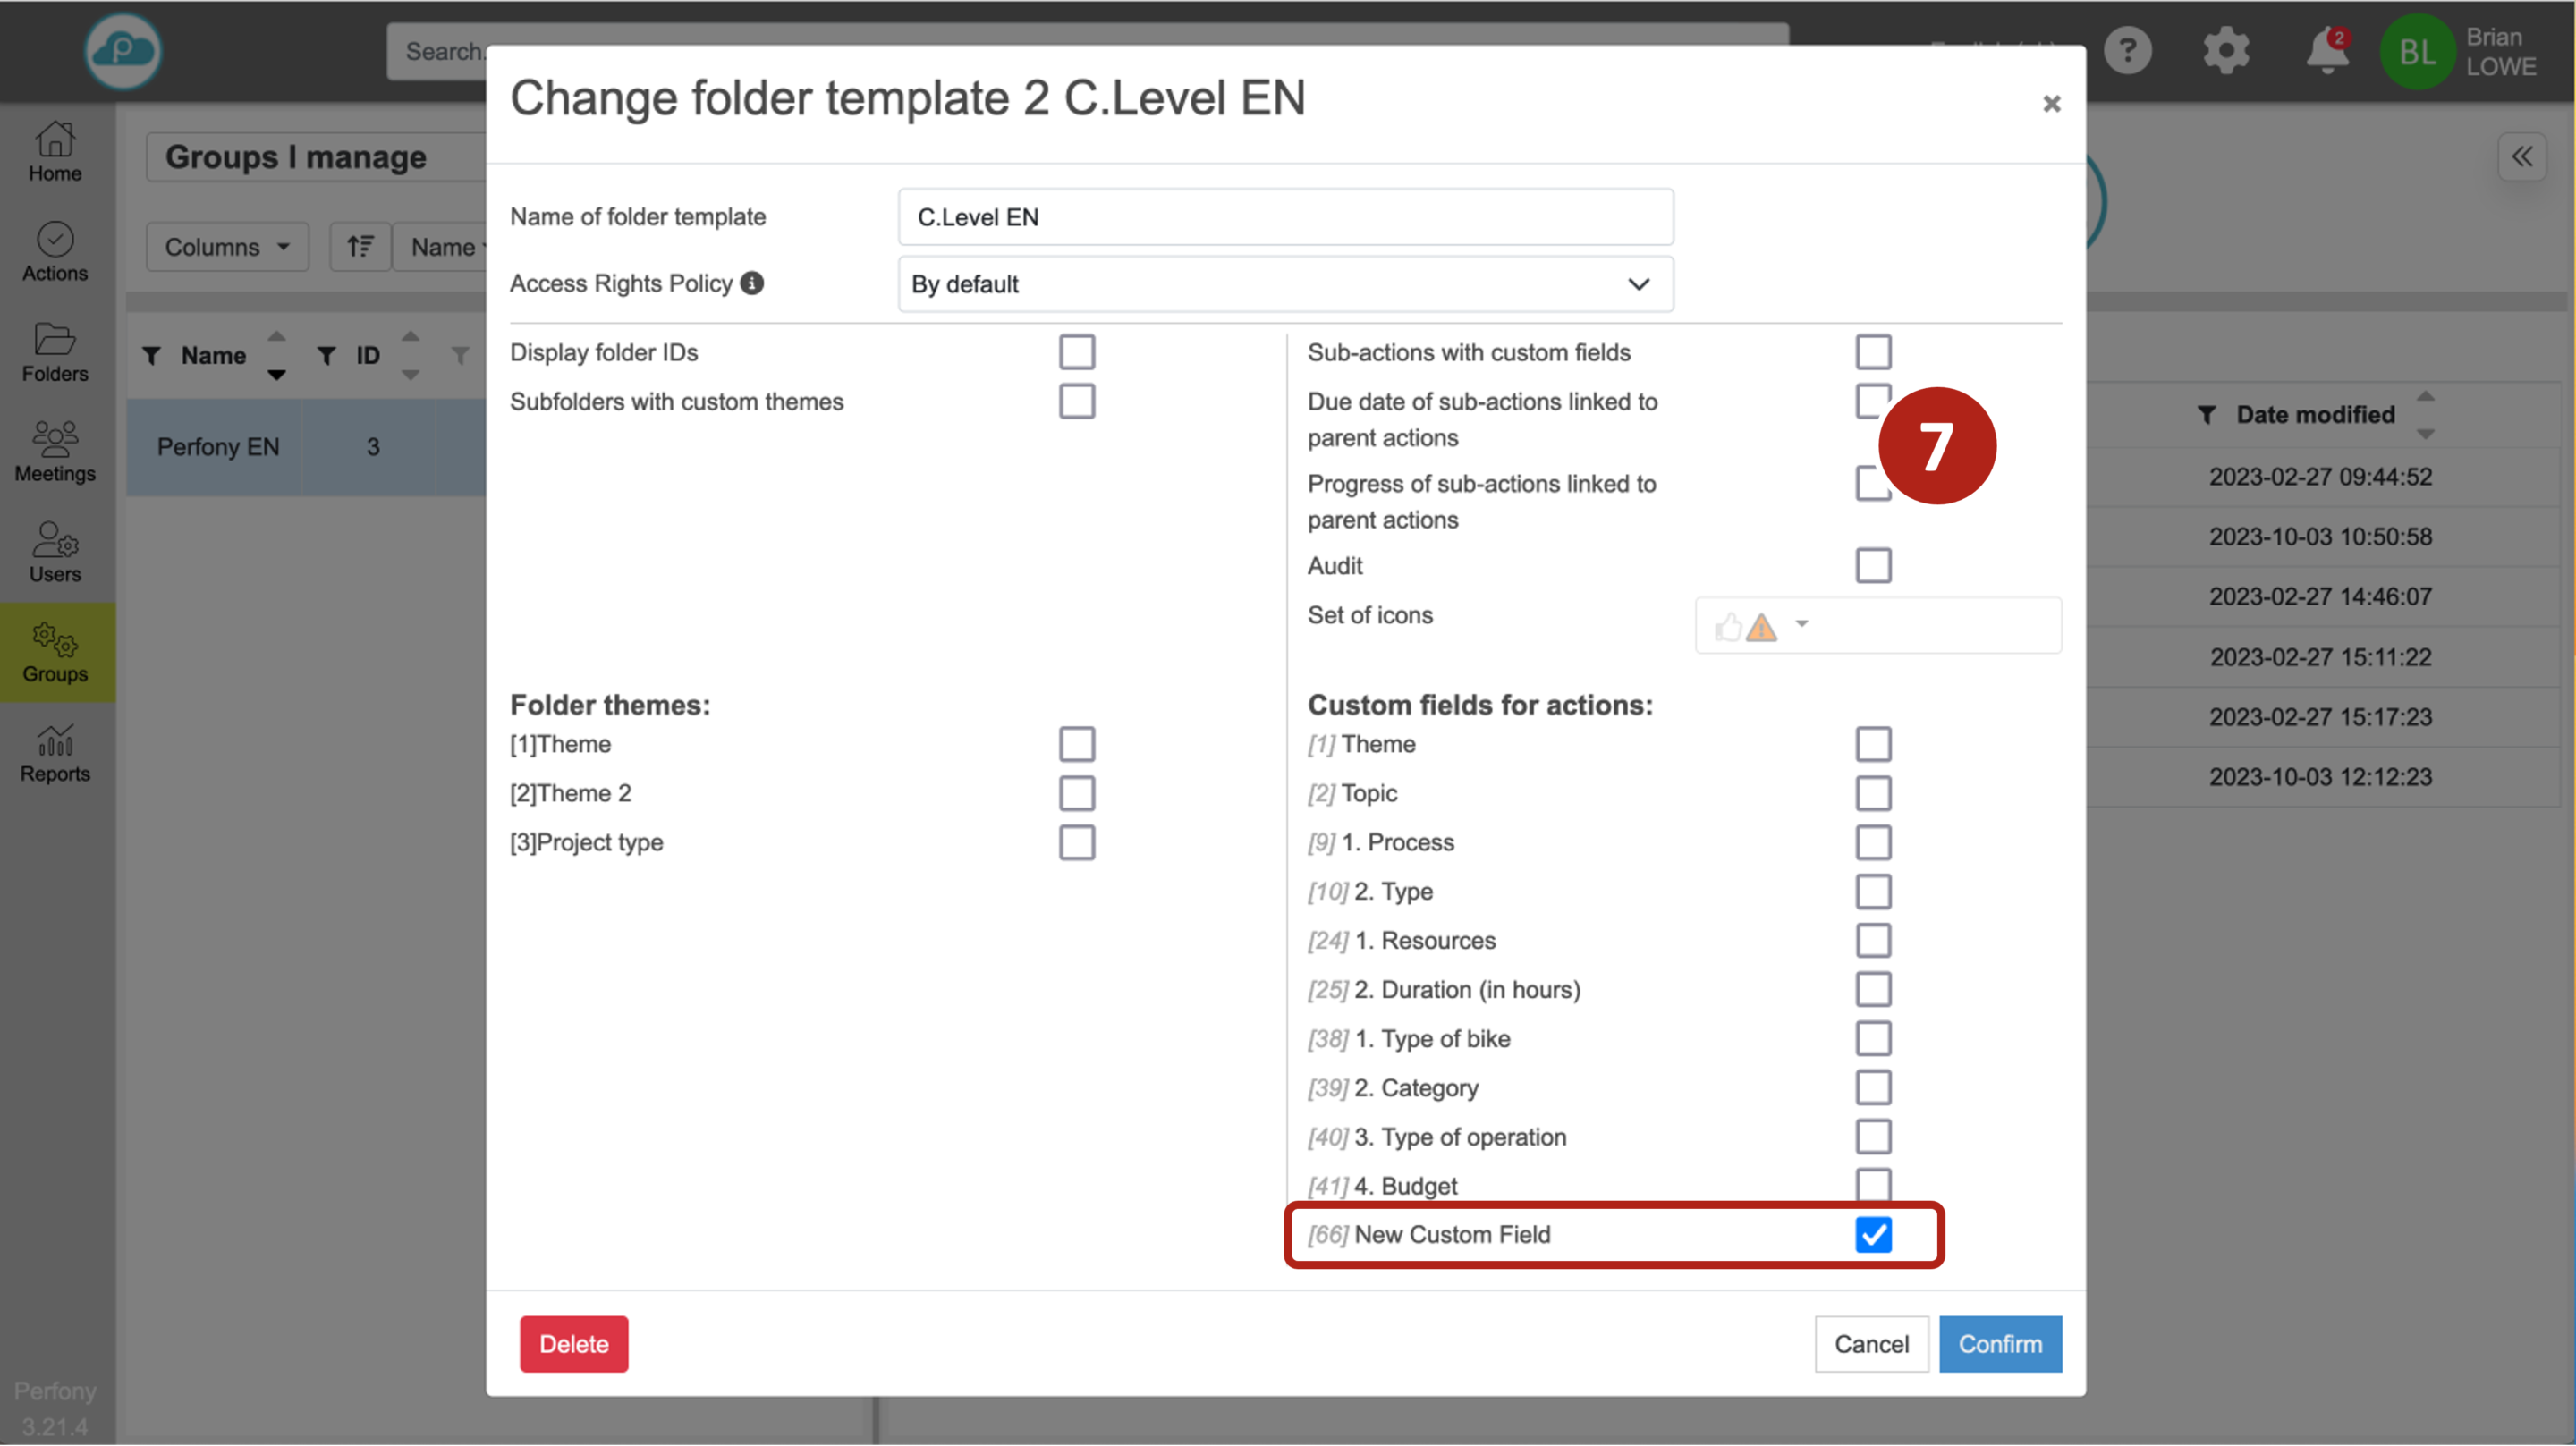
The folder template configuration window appears. On the right-hand side is the list of custom fields available in your group. Select one (or as many custom fields as you like), confirm your choice and the window will close.
You will now have this custom field for your actions which have this folder template.

