Comment pouvons-nous vous aider ?
Connecting Perfony and Microsoft 365
Introduction
The iPerfony for Office365 Connector offers the following functions:
- Automatic login (SSO) for Office365 users in the Perfony web app.
- Automatic login (SSO) for Office365 users in the Perfony tab of MS Teams.
- Automatic login (SSO) for Office365 users in the Outlook AddIn.
- Automatic synchronisation of MS Teams team members with participants in a Perfony folder.
- Access OneDrive for Business documents from Perfony.
The iPerfony OneDrive for Business connector lets you link documents stored on OneDrive to iPerfony. The customer thus retains full control over the organisation of its documents and full control over access rights to these documents. For example, participants in an iPerfony folder to which a document stored on OneDrive has been linked will only be able to open the document if they have OneDrive authorisations.
Authorisation management in Azure Portal
1 – Connect to https://portal.azure.com
2 – Go to “Microsoft Entra ID” > “App registrations”.
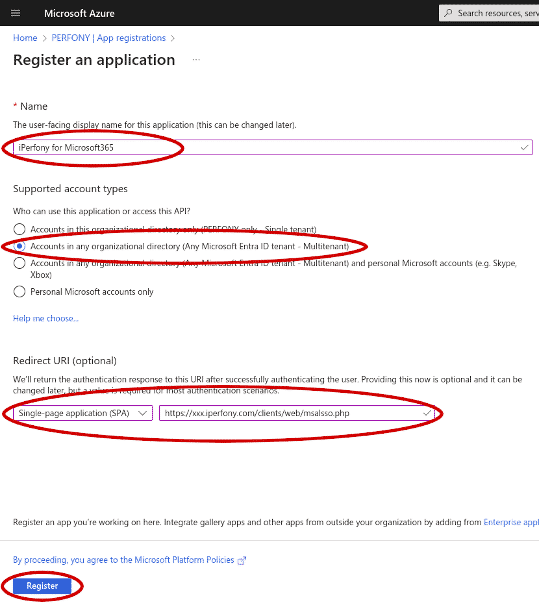
3 – Add an application by clicking on “New registration” :

4 – In the form that appears, enter:
- A name (“iPerfony for Microsoft365” for example).
- Type of account: “Accounts in any organizational directory”
- In the Redirect URI section:
- Select “Single-page application” as the platform type.
- Enter https://xxx.iperfony.com/clients/web/msalsso.php (replace xxx with the name of the client’s Perfony instance).
- Then click on “Register“.
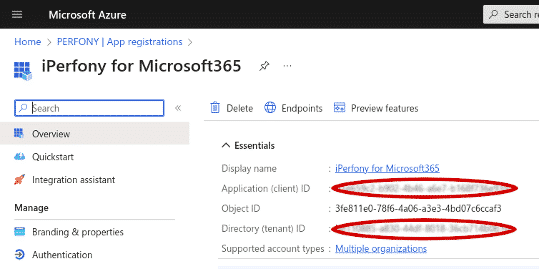
5 – In the next screen, copy “Application (client) ID” and “Directory (tenant) ID“.
Note: This information must be provided to the Perfony teams.
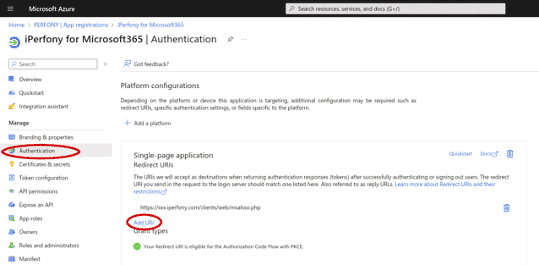
6 – Click on “Authentication“, then on “Add URI” in the “Single-page application” section:
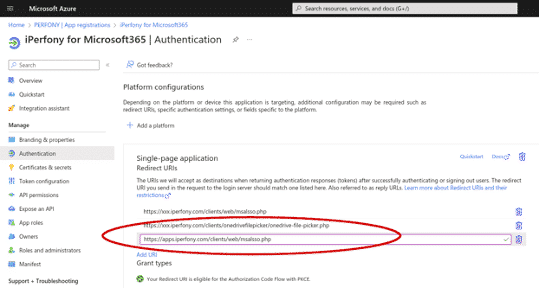
7 – Enter the URL https://xxx.iperfony.com/clients/onedrivefilepicker/onedrive-file-picker.php for the OneDrive connector (xxx should be replaced by the name of the client’s Perfony instance).
8 – Click on “Add URI” again and enter the URL https://xxx.iperfony.com/clients/office365/teams/teams-auth.php for MS Teams OneDrive (xxx should be replaced by the name of the client’s Perfony instance).
9 – Click on “Add URI” again and enter the URL https://apps.iperfony.com/clients/web/msalsso.php for SSO in the Outlook AddIn.
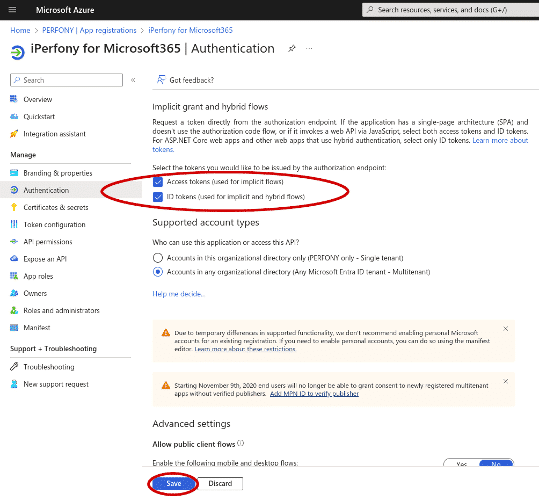
10 – Further down the page, in the “Implicit grant and hybrid flows” section, tick the “Access tokens” and “ID tokens” boxes, then click on “Save“:
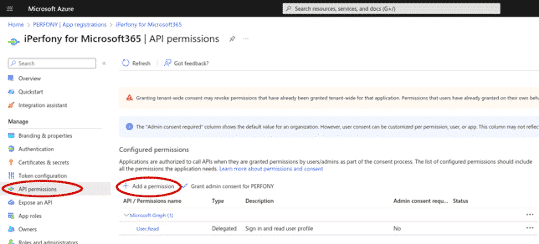
11 – Click on “API permissions” and then on the “Add a permission” button:
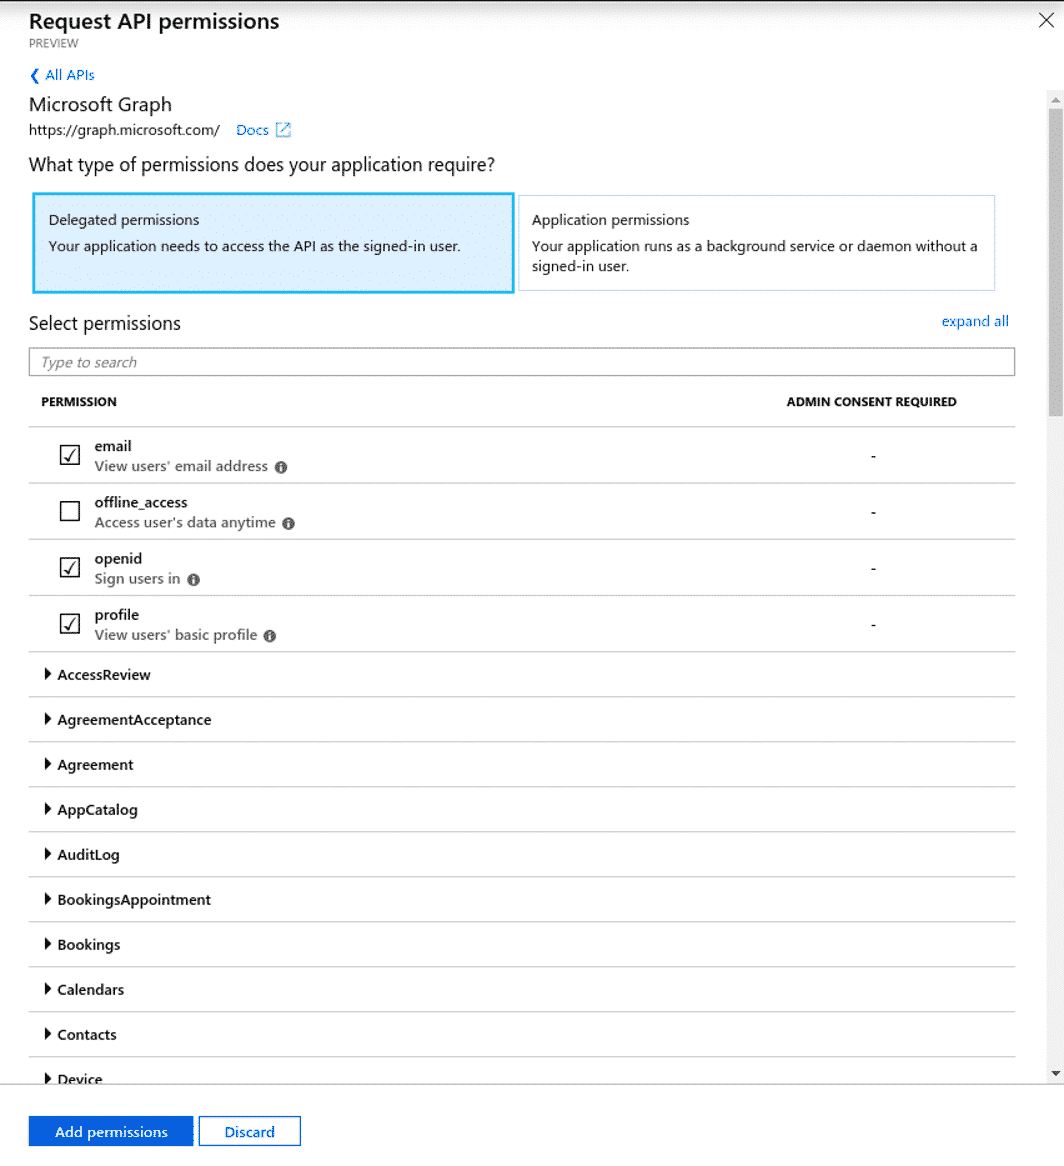
12 – Select “Microsoft Graph” then “Delegated permissions”.
13 – Tick:
- openid
- profile
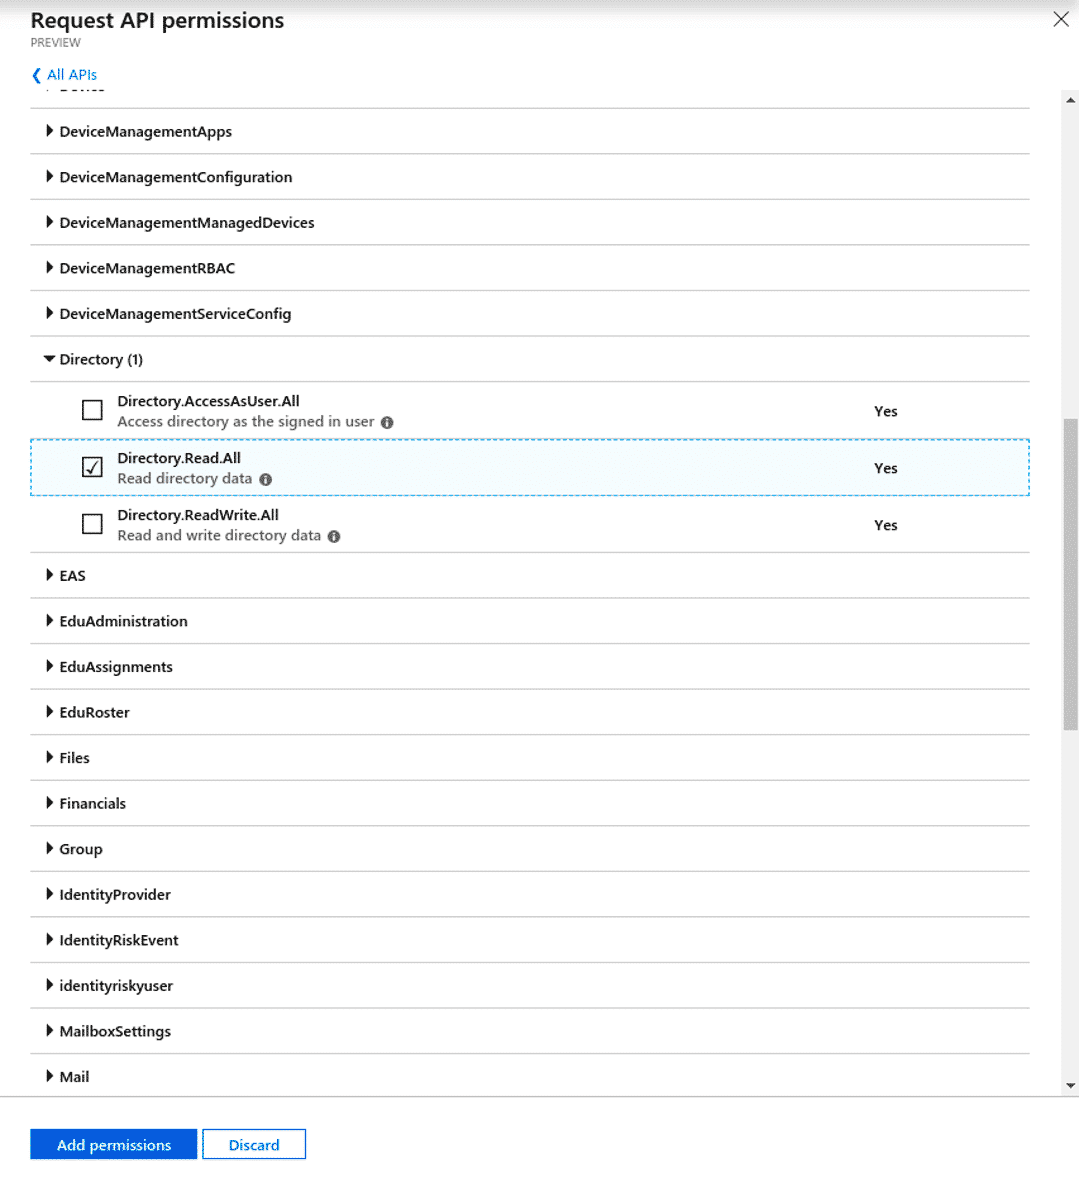
14 – Then further down, in “Directory“, tick “Directory.Read.All” if you want to activate the Teams synchronisation function:
15 – To use the email extension to send messages, you need to give the application the following permissions:
- In ChannelMessage: ChannelMessage.Send
- In Chat: Chat.ReadWrite
- In ChatMessage: ChatMessage.Send
- In Group: Group.readWrite.All
16 – Click on “Add permissions”.
17 – On the new page, click on “Grant admin consent for XXX”:
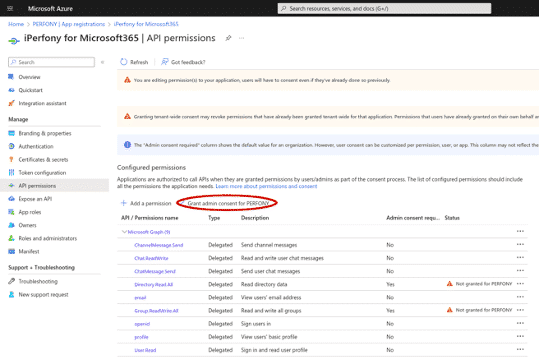
18 – Then click on “Yes“.
At the end of this procedure, provide the Perfony teams with: support@perfony.com
The Application (client) ID
The Directory (tenant) ID
Activated functions: SSO web App, SSO Teams (standard + silent), Teams synchronisation, email extension, SSO for Outlook Addin.