How can we help?
Manage users from the “Users” menu
General Information
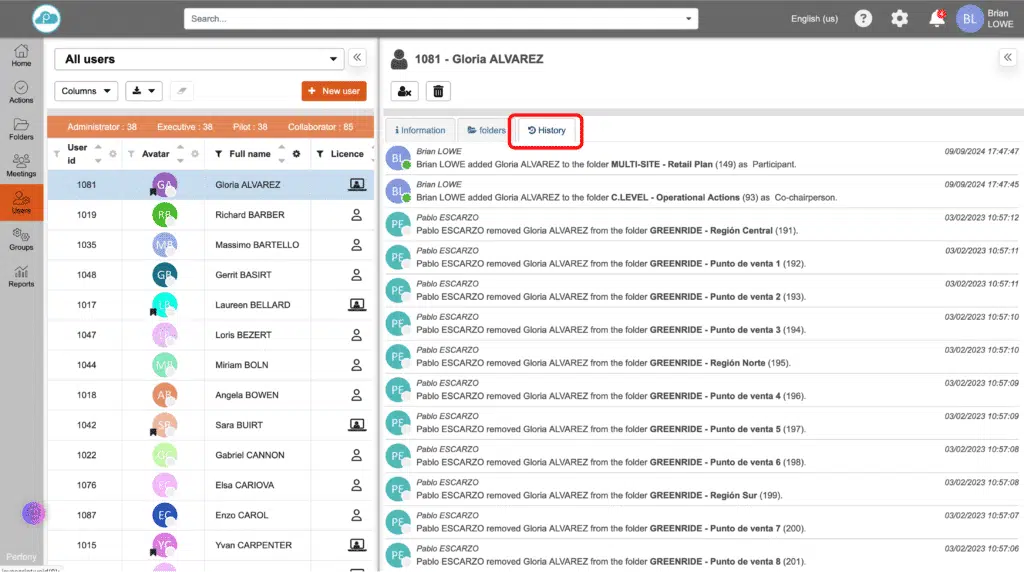
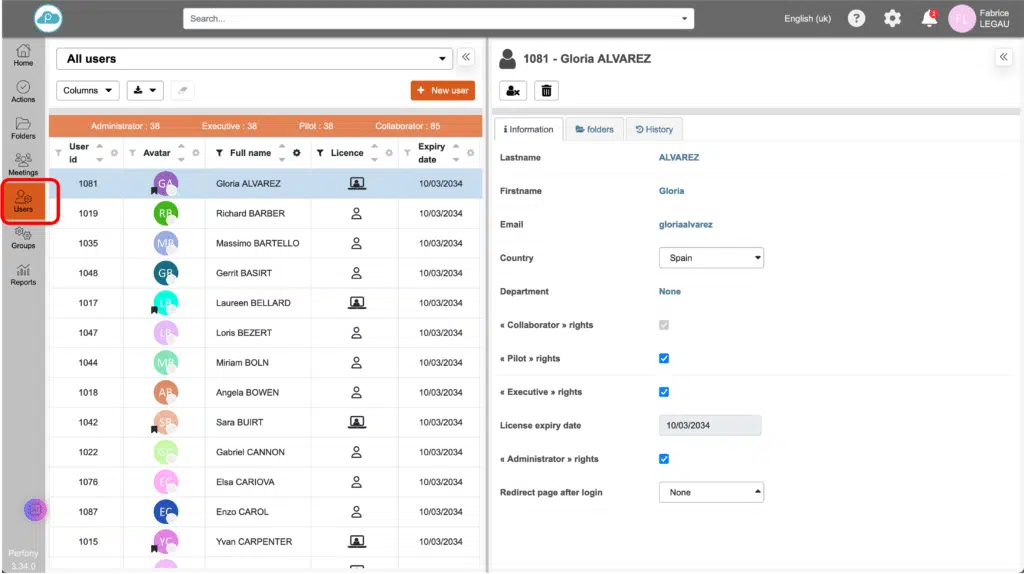
You can manage users for a Perfony account from the “Users” menu in the left-hand sidebar.
This menu is available only to users with an “Executive” license and “Administrator” permissions.
It will allow you to create and manage users, assign licenses, and deactivate and delete users.
Customize the User List Display
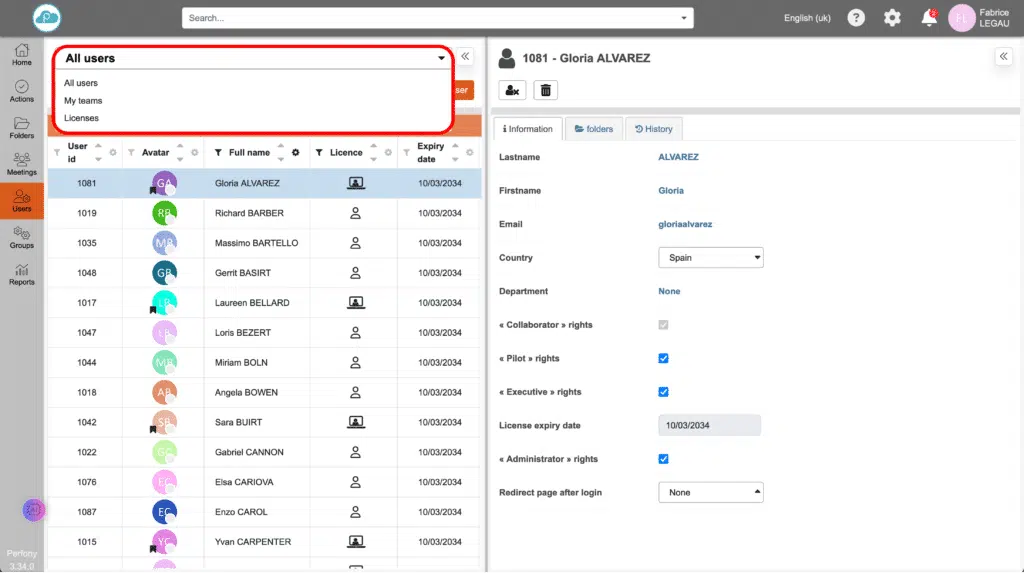
By default, the drop-down menu displays a list of all users, followed by the users in your folders and meetings, and finally a page with a summary showing the number of licenses.
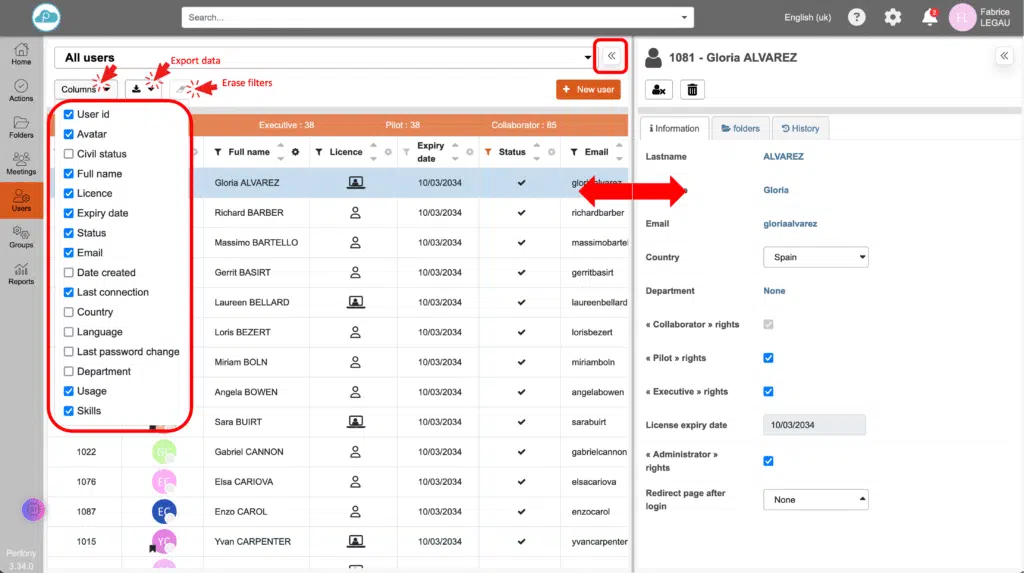
As with the other menus in Perfony, the panels can be collapsed, and their size can be adjusted by selecting and dragging the center bar.
The left pane displays a list of users with a default view that can be customized by adding or removing columns. This list can be exported, along with the selected data, in .csv format.
You can change the order in which the columns are displayed by clicking on a column header and dragging and dropping it between columns.
Sorting and/or filtering by column is available for columns that display active icons in their headers (not grayed out).
Note: Once you have finished filtering your search results, be sure to clear the filter criteria by clicking the eraser icon to the right of the data export button. Otherwise, the default view will not be restored, and you will be left with the filtered data.
Create a user from the Users menu
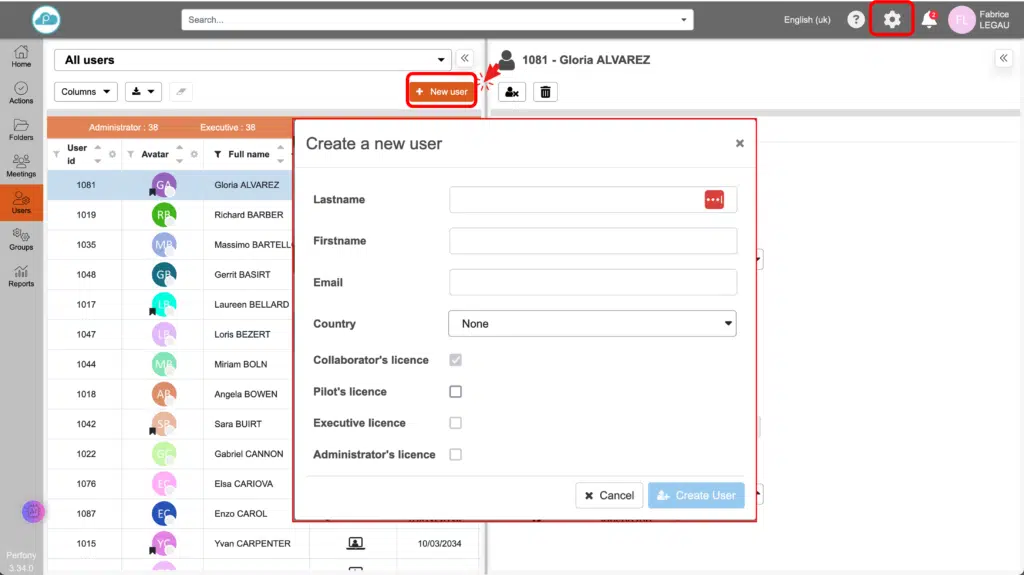
When you click the “+ User” button, a window will open where you can enter the information required to create the account. Once the information is validated, the new user will receive an email granting them access to Perfony, instructions for setting up their password, and a quick guide to getting started with the solution.
To create users in bulk, use the “User Import” module, which can be found in the settings menu in the top horizontal bar. Accounts are created via an .xls file, and no email is sent. You must manually notify new users that their accounts have been created.
Deactivate and Delete a User
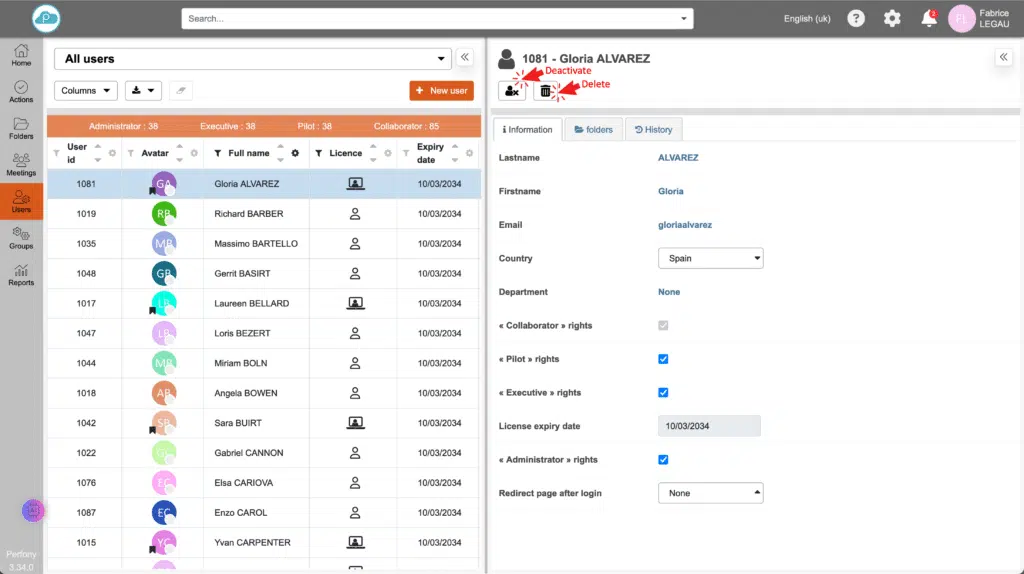
Once a user is selected from the list in the left pane, their name appears at the top of the right pane.
By clicking the “Deactivate” button, the user will no longer be able to log in to the system; their access will be immediately blocked, but they will remain in the database—specifically in the folders, tasks, and meetings they were part of.
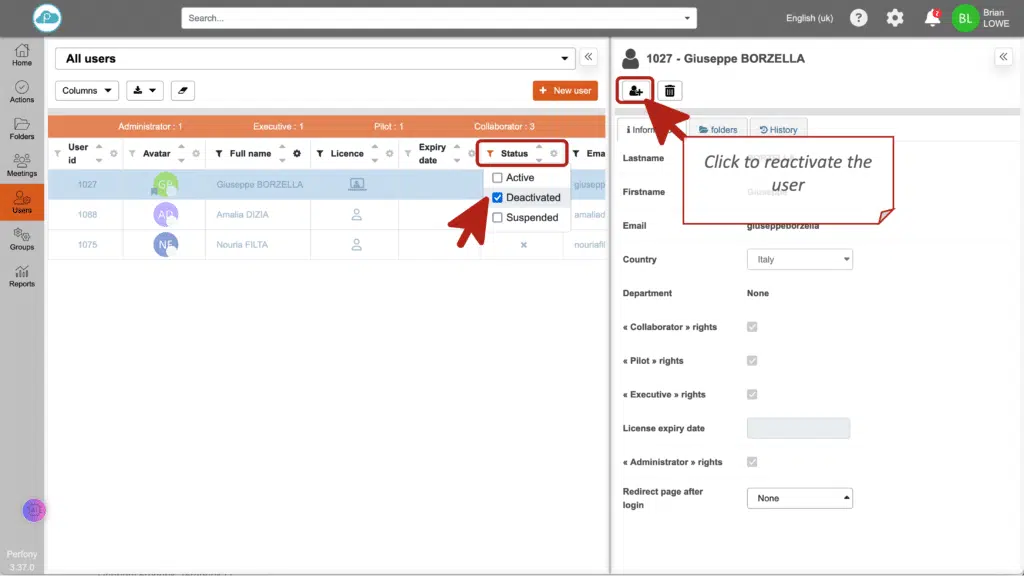
You can reactivate a user by selecting the “Deactivated” filter in the “Status” column. All deactivated users will be displayed. You can select one and reactivate it by clicking the “Activated” button in the right-hand pane again.
The “Delete” button permanently removes the user from the database and also anonymizes their presence in the folders, actions, and meetings in which they participated.
Specifically, for all closed items (tasks, files, meetings), the user’s avatar will be replaced with the message “User deleted.”
For data that has not been finalized:
- Action: The user is removed from their role as manager or contributor
- File: The user is removed from the list of participants
- Meetings: The user is removed from meetings and agendas
- Comments on Unclosed Data: The user has been deleted
- Documents: The user has been deleted
- Favorites: Delete favorites, including sharing and notifications
- Dashboards: The user has been deleted
- Notifications: Deleting Notifications
- Groups: The user is removed from the groups
Please note: Any deletion you confirm is final!
Automatic Deactivation of a User
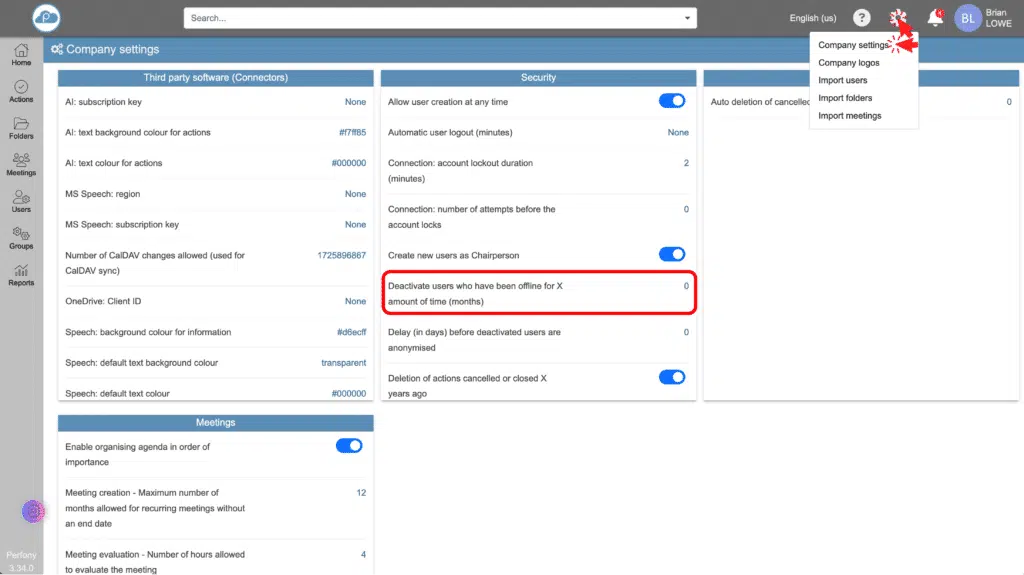
As the administrator of your Perfony account, you have access to the company settings menu, which can be accessed via the gear icon on the top horizontal bar.
In the “Security” section, you can set the time limit after which a user who is not logged in will be automatically deactivated. Before this automatic deactivation takes place, an email will be sent to the user informing them that their account will be deactivated within 15 days if they do not log in to their Perfony account.
Reactivate a user
Users must be reactivated one by one. Using the filter in the “Status” column, select “Deactivated.” A list of deactivated users will appear. Simply click the “Activate this user” button in the right-hand pane. The user will once again have access to their Perfony account.
User Account Information
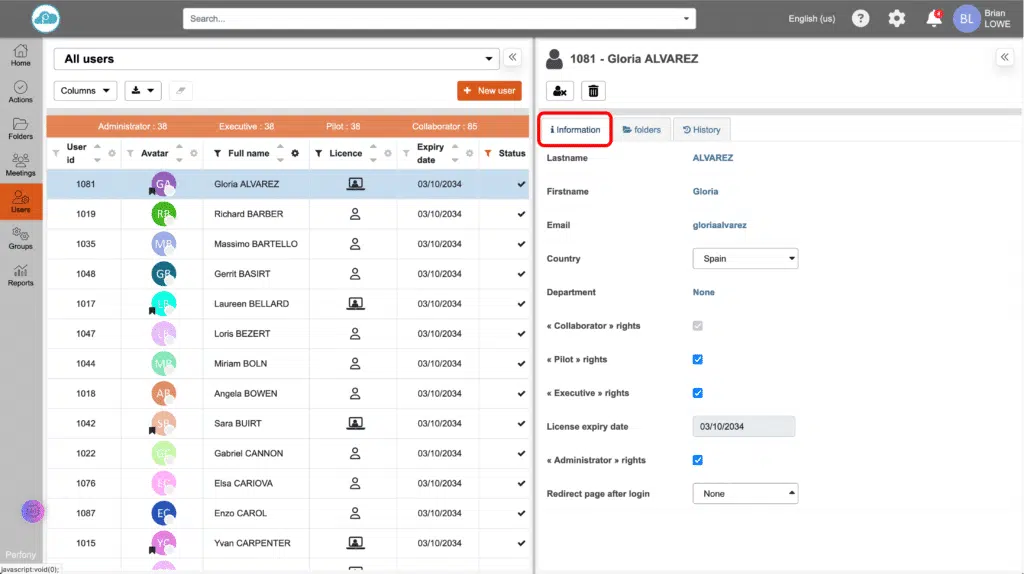
The first tab in the right-hand pane displays user account information, which can be easily edited. Assigning users to countries is important for adhering to and managing meeting time zones.
Please note that changing your license type may result in additional charges depending on your subscription plan.
Assigning a User to Folders
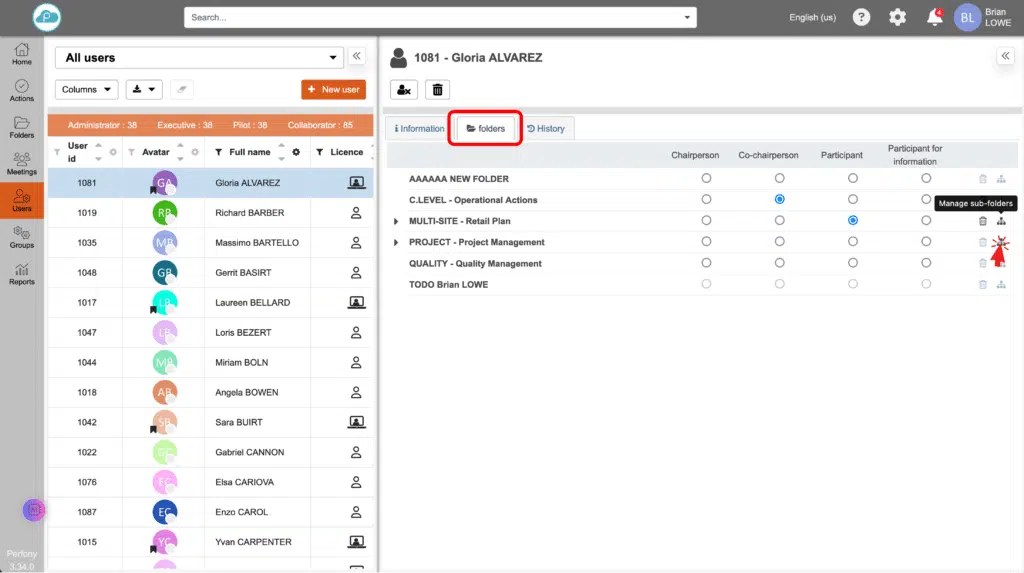
The second tab in the right-hand pane makes it easy to assign users within the folder tree. Simply click the checkbox next to each folder to add the user as a presenter or participant. Permissions for the folders will depend on the user’s license.
The “subfolder” icon at the end of the line opens a window that lets you manage the user across all subfolders with a single click.
Please note: The folder tree displayed is the one to which you have access. In other words, you will not be able to assign the user to folders that you do not have access to. Each driver will need to do this from their own folder, or you can do it as a SuperAdministrator.
User Account History
The third tab allows you to view all changes made to this user’s account since it was created.